

Buyers usually picture a bottle mould as one hollowed block of steel. It is a set of parts that open, close and hand your glass from one to the next, and once you know which part does what, every mark on your bottle has an address.
The 4 Parts of Your Mould Set
| Part | What it forms | What it means for you |
|---|---|---|
| Blank mould | The parison, in the first half of your cycle. | Your wall distribution, decided here and only amplified later. |
| Neck ring | The finish, formed first and formed complete. | Thread accuracy, sealing surface and closure fit. |
| Blow mould | The body, shoulder, heel and base. | Your shape, embossing and the visible surface quality. |
| Baffle and bottom plate | The closed ends of each mould, top and base. | Base engraving, punt depth and the cavity number on your bottle. |
Why Your Bottle Carries Seam Lines
A mould has to open to release your bottle, so every set parts along a face. That face prints a faint line on the glass, and a container normally shows three of them.
Two run up your body from the base to the shoulder, where the blow mould halves meet. One circles the finish where the neck ring parts, which is why it sits at a different height from the body seams. A fourth can appear around the heel where the bottom plate seats.
Where a Designer Puts the Parting Line
Seam placement is a design decision, not an accident. On a round bottle the line goes anywhere, so it usually sits opposite the front label panel.
On a square or oval bottle the choice narrows. Putting the seam on a corner radius hides it in a shadow; putting it in the middle of a flat face makes it the first thing your customer feels. SGSBOTTLE mould engineers mark the parting line on your drawing before any steel is cut, and the finished mould goes to one of the 14 lines in Shandong and Xuzhou.
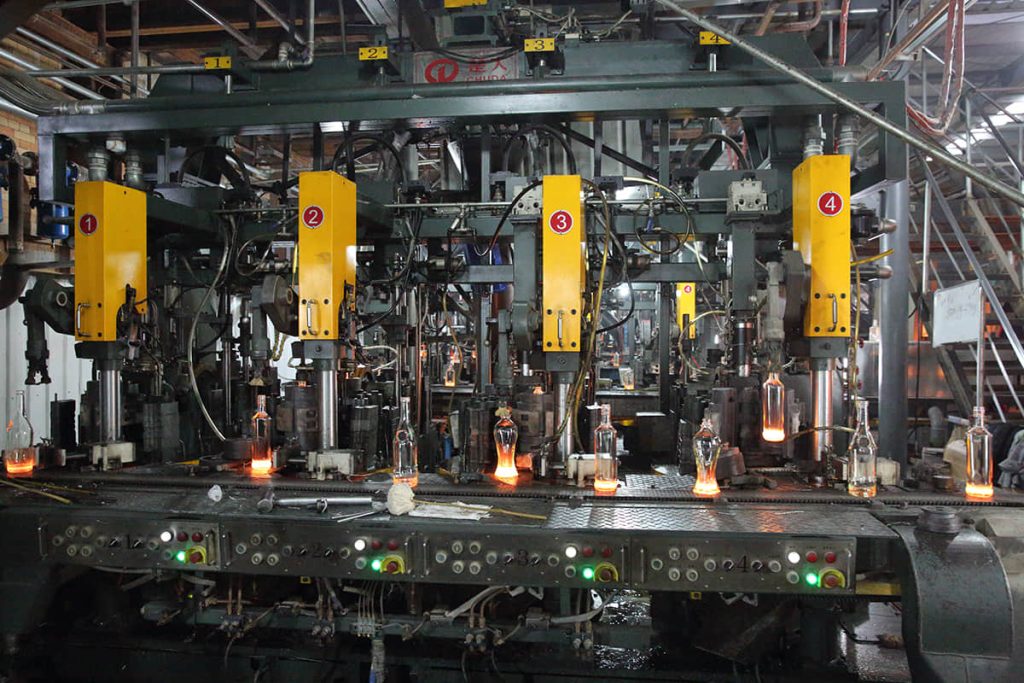 Blank, neck ring and blow mould hand your glass along in sequence on all 14 SGSBOTTLE lines.
What Each Part Costs You When It Wears
Wear does not arrive evenly across the set. Your neck ring goes first because it forms the tightest feature under the hottest glass, and a worn one shows as loose closure fit long before anything else looks wrong.
Blow mould wear shows next on a 500 ml (17 oz) body, as a thickening seam or a soft edge on embossing. Blank mould wear is the hardest to see because it changes your wall distribution rather than the outside of the bottle, which is why cold-end gauges matter more than a visual check.
Cavity Numbers and Why You Want Them
Look at the base of almost any bottle and you find a small number. It identifies the cavity that made it, and it turns a complaint into an investigation.
When a defect repeats, the cavity number tells your supplier whether the problem sits in one mould or across the set. A 750 ml (25 oz) run that fails on cavity 6 alone is a tooling repair; the same failure across every cavity is a process problem. Ask for cavity marking on any custom project, since it costs nothing and saves a week of guessing.
What Goes on Your Enquiry
Your drawing or reference bottle, the format in ml and oz, your label or sleeve layout, and any face that must stay free of a seam. SGSBOTTLE comes back with a mould-set proposal, the parting-line position and the cavity marking plan for your project.